Offline
is one productivity tool that will never stop creating unnecessarily lengthy, space-stealing whitespace in your document, especially as you insert items such as tables and graphs.
The whitespaces sometimes take an entire page, leaving you with no option but to delete them for a cleaner look. For some people, it’s a text-filled page that’s no longer relevant that needs deleting.
Whatever the case, you’ll find out how to quickly delete a page in Word with the guide in this article, so keep reading.

All the highlighted texts should be gone at this point, causing the page to shrink or disappear entirely. There is no dedicated page delete tool in Word, so this is your best bet.
Quick Note: While dragging the cursor across the content as in Step 2, ensure you do so down to the very bottom of the page, even if it’s empty. Whitespaces stem from unnecessary paragraphs and spaces.
This method should shrink the paragraphs and fit them on the last page. You can then press the key combo in step 4 again to hide the paragraph marks.
Related: Check out our detailed guide on , paragraphs, and other hidden formatting options in Word.
The whitespaces sometimes take an entire page, leaving you with no option but to delete them for a cleaner look. For some people, it’s a text-filled page that’s no longer relevant that needs deleting.
Whatever the case, you’ll find out how to quickly delete a page in Word with the guide in this article, so keep reading.

How to Delete a Text-filled Page in Word
Deleting a Word page filled with texts or graphics is relatively easy. The following steps will guide you in that regard:Step 1
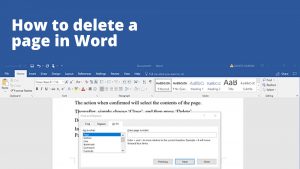
Select the page you want to delete by scrolling to the page manually. Alternatively, press Ctrl + G on Windows or Option + Command + G on MacOS to go to the page you want to delete.Step 2
Highlight all the texts or items on the target page. You can do this by pressing Ctrl + A on your keyboard or dragging your cursor across the entire page content from the beginning to the bottom.Step 3
Delete all the highlighted texts by pressing the Delete button on your keyboard. Otherwise, you can cut them off by using the key combo of Ctrl + X.All the highlighted texts should be gone at this point, causing the page to shrink or disappear entirely. There is no dedicated page delete tool in Word, so this is your best bet.
Quick Note: While dragging the cursor across the content as in Step 2, ensure you do so down to the very bottom of the page, even if it’s empty. Whitespaces stem from unnecessary paragraphs and spaces.
How to Delete an Empty Page in Word
Whitespaces and empty pages are prevalent issues in Word, with no fix in sight as Microsoft doesn’t even consider it a problem. However, with the following steps, you’ll be able to get rid of them in a snap and give your document a cleaner and more professional look:Step 1
Find blank pages and whitespaces by opening up the navigation pane. To do this, go to the View tab and ensure the navigation box is check-marked.Step 2
When the sidebar comes up on the left side of your screen, click Pages to see all the pages in your document.Step 3
Scroll through the list of pages and double-click the one you want to deleteStep 4
Enable Paragraph Marks by pressing Ctrl + Shift + 8 on Windows or Command + 8 on .Step 5
Click the paragraph marks so that they are highlightedStep 6
While the paragraph marks are highlighted, go to the Home tab, input 1 in the Size box, and press Enter on your keyboard to apply the changes.This method should shrink the paragraphs and fit them on the last page. You can then press the key combo in step 4 again to hide the paragraph marks.
Related: Check out our detailed guide on , paragraphs, and other hidden formatting options in Word.